
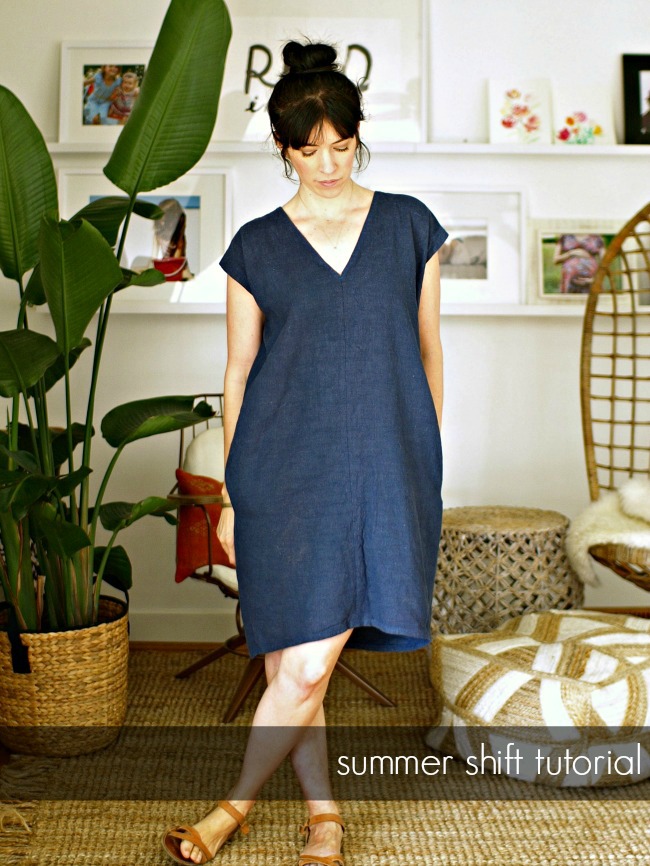
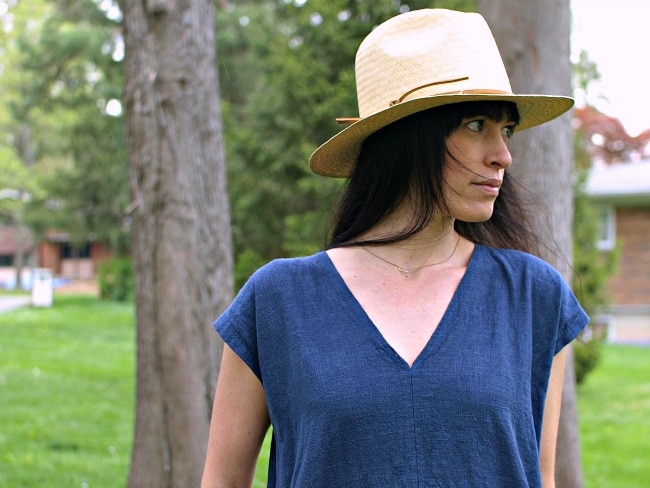
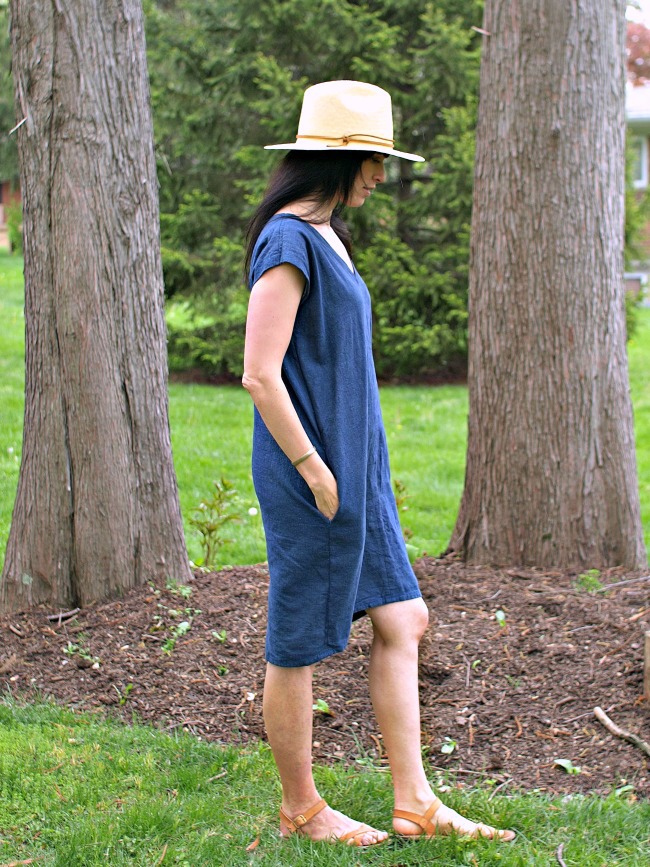
It can be hard to find free sewing patterns on line that are both easy and on trend, but I think this one fits the bill. You may remember the swim cover up I made a couple months ago, well this is basically the same thing, except with pockets! And in linen, which I lurve. When summer hits I love having those super easy, no-brainer dresses you can just throw on and be comfortable the rest of the day. This is definitely a loose and boxy fit, but you can make it as long or as short as you want and if you have the know-how to add some darts go for it I say. This will take you probably 3 hours (or less) to sew and you’ll wear it all summer long. Pinkie promise. Both dresses are based off of this tutorial I found on line.
supplies:
2-3 yards fabric (I used an indigo linen I found at Joann’s)
thread, scissors, sewing machine/serger, iron, measuring tape
pocket pattern (from See Kate Sew)
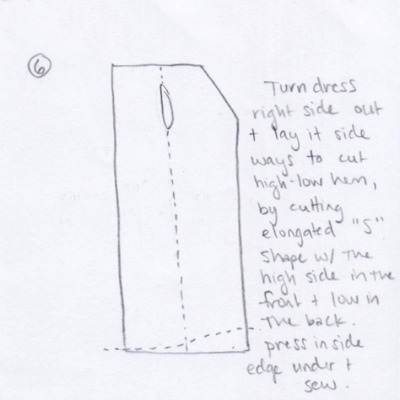
First, for heaven’s sake pre-wash your fabric. Don’t skip this step, especially with linen, or you’ll be very, very sorry. Next, start by measuring around the widest parts of your hips/butt then add about 25 cm. This is your width. Then measure from the top of your shoulder to where you want your dress to hit and add 1.5-2 inches for seams. This is your height. If you do a high-low hem, as I do here, you want to make sure you give yourself enough length for the longest part of the dress.
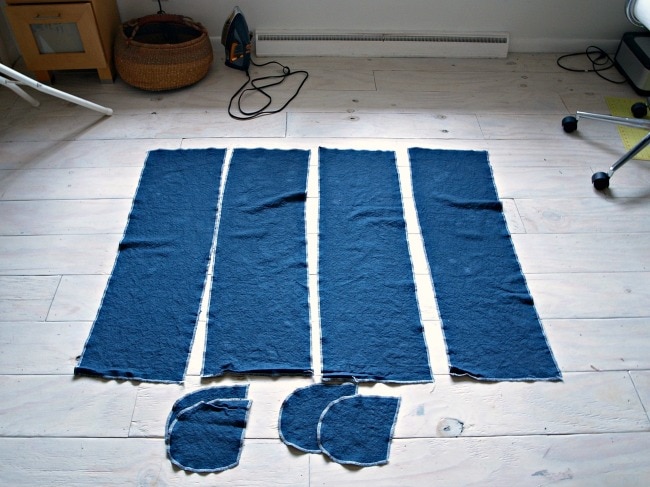
1. Take your width and divide it by 4. You will cut 4 pieces of fabric to width/4 x height. Also cut out 4 pocket pieces. If you have a serger you may want to finish all your edges with the serger first. (Some do this after on all finished seams, but the pattern is so simple I did it before.) You do not have to have a serger to make this dress! You can zig zag the edge of the fabric too. Just as easy or hard…whatever.
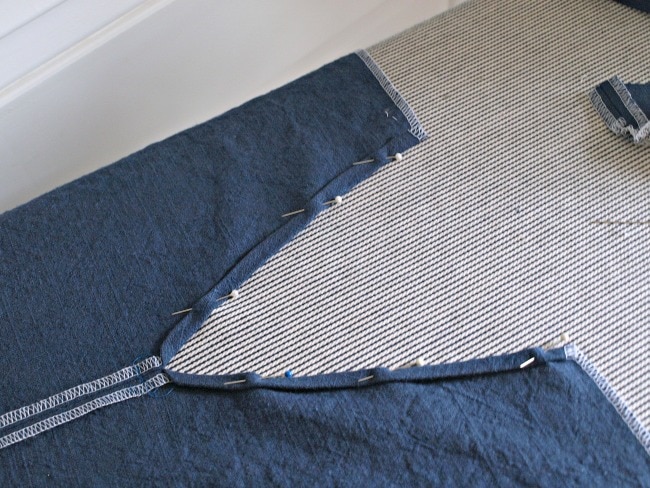
2. Now take two of those fabric pieces and with right sides together (my fabric didn’t have a right or wrong side) sew along one long side. This is the back, Now take the other two sides and sew up almost all the way leaving room for a v-neck. You’ll want to measure from your collar bone to your chest to figure out about how low you want your neckline to go.

4. Now on both the front and the back pieces you need to sew the pockets onto the sides. Make sure you measure from the top of your dress down so placement is equal. Then pin right sides of pockets to right sides of the dress and sew in place. In the drawing below that fabric is right side out, with the right side of the pockets face down. So make sure the seams are on the opposite side. I’m emphasizing this step because at first it feels counter-intuitive but it will make sense.

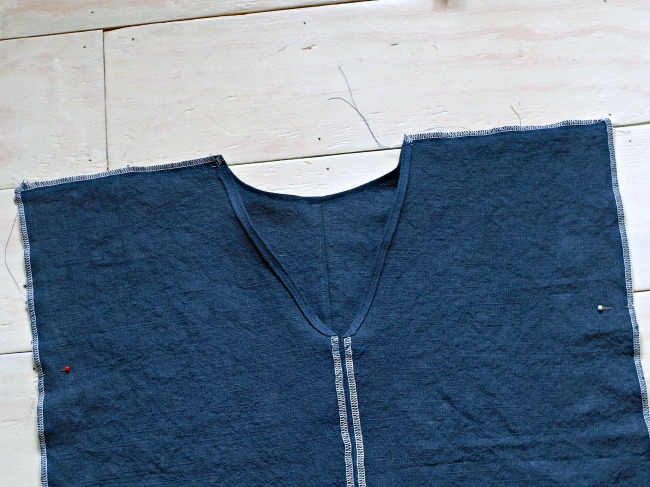
5. Now cut off excess neckline leaving enough of an edge to fold over twice, pin and sew in place.
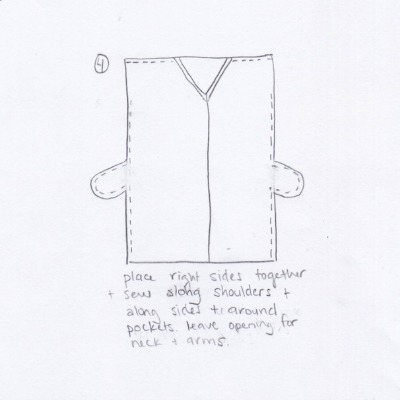
6. Now place rights sides of dress together and sew top of shoulders together. Also, go ahead and fold down the back of the neck, pin and sew seam in place. (You don’t have to cut a dip in it like I did–you can sew it straight across, but I think the dip was nice.)
7. Figure out how much room you want for your arm holes (start bigger, you can always sew up more if you want them smaller). Place a pin on each side to hold your place. Again with right sides together sew down each side and around the pockets as well. Do not sew across pocket opening. See drawing below.

I also loved this look paired with my favorite straw hat…as always styling changes everything.
Happy Sewing.
XO
Miggy

I love it!!! Thank you so much!!
You're welcome so much!!
gonna do it
Do it!! I wanna see it in about 3 weeks. 🙂
So cute! Can you also tell me what kind of tree is next to you in the top pic? I am looking for an indoor tree/plant.
Thank you! And yes, that plant is definitely my favorite. It's a bird of paradise houseplant.
https://www.google.com/search?q=bird+of+paradise+houseplant&safe=active&client=safari&rls=en&biw=1235&bih=661&tbm=isch&tbo=u&source=univ&sa=X&sqi=2&ved=0ahUKEwi0kuay_MHMAhXD7R4KHUS8DCYQsAQITg
I started this dress Saturday night using fabric from a rayon skirt. Need to grab more thread and a little time, but I like it so far. Thanks for the tutorial!
Wow! I'm so happy I have figured out how to make this. Thanks for the pattern and easy step by step guide.
A woolen floppy hat is the cold weather version of a summer straw hat. Women's Panama Hat
Going to select and wash my fabric so I can make this dress this week. Love the relaxed nature of this dress.
Looks simple enough but I’ve screwed up 2 piece patterns before.
I’ve been looking for something easy with a teeny bit of a challenge (pockets!) for my first dress sewing, and this is awesome! Thank you for the detailed instructions. I’m gonna do it!