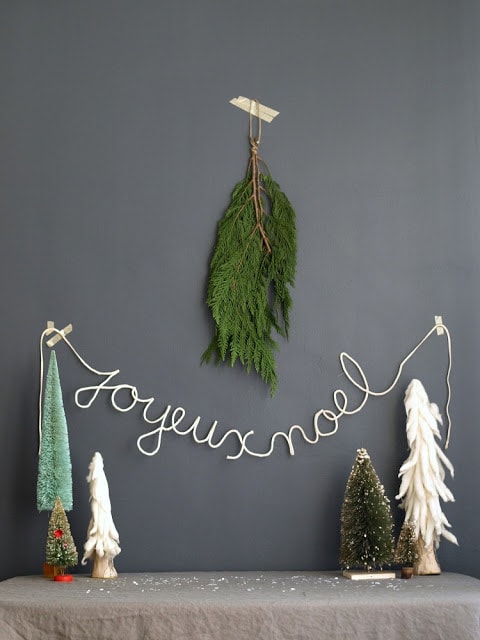
Supplies:
parchment paper
18 gage floral wire
braided trim or similar (large enough to cover the wire)
hot glue.jpg)
1. I started by using a large sheet of parchment paper and drawing a straight line. Then, I free handed ‘joyous noel’ in pencil. Once I had a couple letters on there I drew some guide lines on the top and bottom to help with scale and proportion.
2. Then I took my wire and held it down on the paper and started bending it into shape.
3. When the line has to cross itself I just wrap the wire around for more stability.
4. I also found that putting a book over the letters I finished as I continued shaping helped a lot.
5. Once my wire was all bent into shape it was time to add the trim. (Don’t worry–the wire lettering wouldn’t lay totally flat or exactly in the place of the letters I drew…it will be fine.) I wasn’t sure I had enough trim, so I roughly traced over the wording with the string to make sure I had enough. I did! Barely. Also, make sure you leave a generous tail at the beginning and end to actually hang it from.
6. Start gluing the string on with hot glue. You want to hit that fine balance between enough glue so that it sticks, but not so much that it oozes out the sides. Also, it’s a great idea to do the gluing on top of the parchment, so it won’t stick or ruin any surface underneath. (That being said, the heat could still ruin a surface underneath, so make sure to protect the surface underneath.)
7. Again using books to hold down the wire base, both before and after the twine is attached is a good idea. I would suggest using beloved classics and/or best sellers with fancy gold labels on the front so everyone knows that you’re well read.
8. Let the glue cool down and cut off excess glue here and there–then you’re done! Easy peasy lemon squeezy.
I really love the braided twine–it loops and it folds over itself really well. This would also be fun in some sort of shimmery gold or silver..jpg)
Happy making!
XO
Migs
After I was working on this yesterday I saw that Poppytalk was vibing the exact same photo!
So funny this small internet world.
.jpg)


.jpg)
.jpg)


Wow, that looks great! I love your ability to take an idea and improve upon it so much!
I haven't stopped thinking about this since seeing it at your house last Christmas;) I thought I would have made it by now in Italian but alas!! It's #1 on my free time to do list next week. Buon Natale!!
xoxox friend!