I’ve decided to start a new series I’m really excited about called Paint Your Clothes. When it comes to crafty stuff I almost always find a way to mix paint and fabric. Forever ago I did a cool monoprint fabric DIY for DesignMom. My feather printed baby blanket stamped with a sweet potato still ranks as one of my most popular posts of all time. And most recently I did a c!ao t-shirt for myself and the instructions for today’s post are going to be very similar.
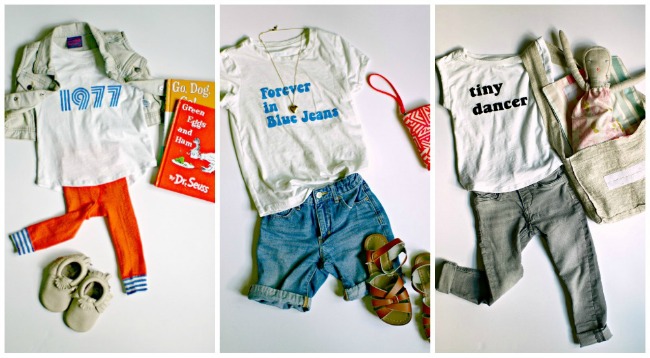
I’ve been wanting to do some lyrical t-shirts for the kids for quite a while. Who doesn’t love a good song lyric? I ended up doing two shirts with song lyrics and one with a vintage font and the year 1977. I choose a very 70’s looking font for 1977, which also happens to be my birth year. Lamp likes this shirt as she says it reminds her of me. Awww. I think this would be cool with another year and a font that represented that era.
These are really glorified freezer paper stencils that are a little more pristine with the help of a Silhouette cutting machine. If you have a silhouette or similar machine you can whip one of these out in no time! If you don’t have a silhouette… well you should buy one. I use mine so often! It’s a great investment. (Not a sponsored post!) Back to the shirts, you can do this with any font or even an image you see online. Here we go:
Supplies:
Silhouette Cutting Machine or a sharp exacto knife and cutting matte
White t-shirt (mine was from Target)
Freezer paper
Iron
Fabric/craft paint (I use Martha Stewart’s craft paint) + Brush
.jpg)
1. Choose your font (I’ve been liking this site for retro fonts) and download to your font book. Type the words you want in the font and arrange them for spacing and whether you want them centered or oriented left or right. (Last time I told you not to download the font–you still don’t have to–but it looks much cleaner if you have the entire word or phrase all typed out and spaced before you arrange it in Silhouette design.)
2. Now take a screen shot of the entire phrase/image. Then open your Silhouette Design software and open up a new page, then drag your screen shot onto the page.
3. Then your going to select your trace tool. Then click on the “select trace area” button and select the entire phrase or picture at once. (You can also select letters individually still if the spacing is too far apart as it was for me in this 1977 shirt.) Before you’re finished selecting it, you’re going to go the the high pass filter and move it up so that it fills in the middle of the letters so it’s a solid block of yellow. Once all the letters are highlighted, hit the trace button.
.jpg) 5. Cut and place your freezer paper on your cutting mat. Put the cutting mat into the machine, adjust your cut settings and cut!6 Now you’re going to be using the negative space, not the letters themselves. So make a cut at the top and the bottom of the word and peel that area up.
5. Cut and place your freezer paper on your cutting mat. Put the cutting mat into the machine, adjust your cut settings and cut!6 Now you’re going to be using the negative space, not the letters themselves. So make a cut at the top and the bottom of the word and peel that area up.
7. Lay your shirt out on your ironing board. If you have a ruler you may want to use it to get a nice, centered placement. Once you get the placement right, iron over the freezer paper. Make sure to add the middle of any letters that may need to be included. Go over the edges well so that none of the paint gets underneath the stencil.
8. Mix up your paint in whatever color you want and dab it on the shirt. Let it dry and give it another coat. Let it dry. Hold it up to the light to see if you need another coat or to touch up any areas. It’s worth the wait to make sure it’s painted really well the first time! Peel backing off and you’re done.
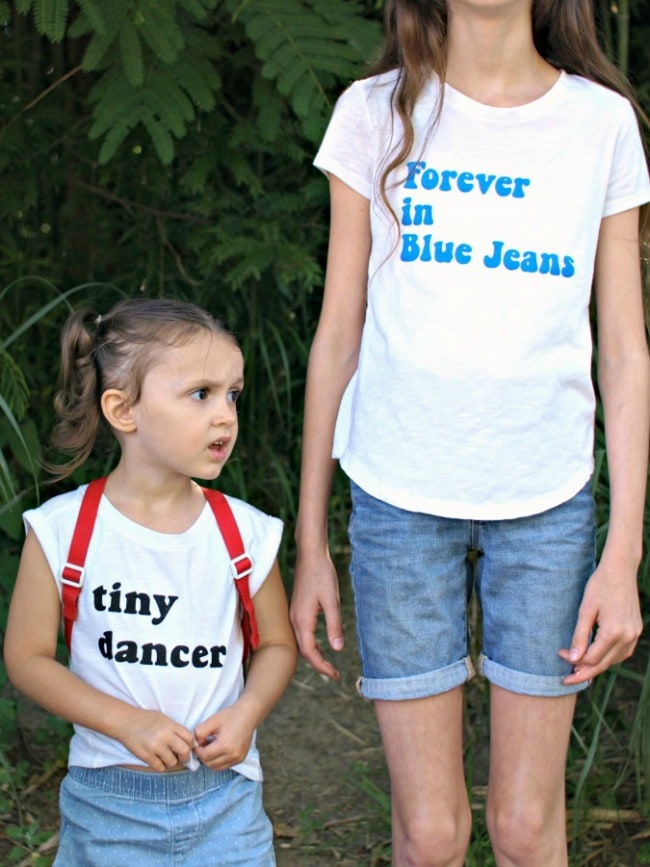
I love these! Such an easy way to personalize shirts for your kids. Let them work with you, choose their own sayings, etc. It’s so easy.