

I’m sure you’re all familiar with the beautiful and iconic Jess Brown dolls. I first learned about them through one of our favorite children’s books Kiki and Coco in Paris. I wanted one of those dolls! These dolls are gorgeous. However, at $198-$240 a doll they are not cheap. And I don’t think they should be! They are a high quality, hand made product and I’m glad people see the value in them. But for me, with three girls I couldn’t justify the cost of getting one for each girl. Additionally, I believe in handmade gifts, especially if those gifts can become heirlooms. I made two of these dolls for my youngest girls a couple Christmases ago and this last week PSP and I finally made one for her. I hope they will always treasure the dolls I made for them and I hope PSP has good memories of making her doll together.
Jess Brown herself encourages people to make their own rag dolls and has a pattern in her book, The Making of a Doll, so you can make your own. However, this is my own simplified pattern and it differs from the Jess Brown dolls, but the results are similar and they are super easy to make. Promise. Of course you could always get Jess Brown’s book and use her pattern, but I’m going to show you my version, including making your own very easy doll pattern. If you are already a sewer and have lots of fabric and scraps around you can easily make a doll or two in an afternoon.
Lets get started!
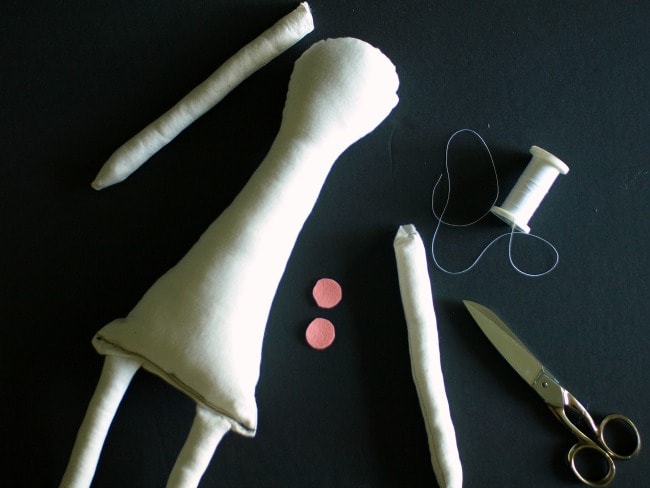
Supplies:
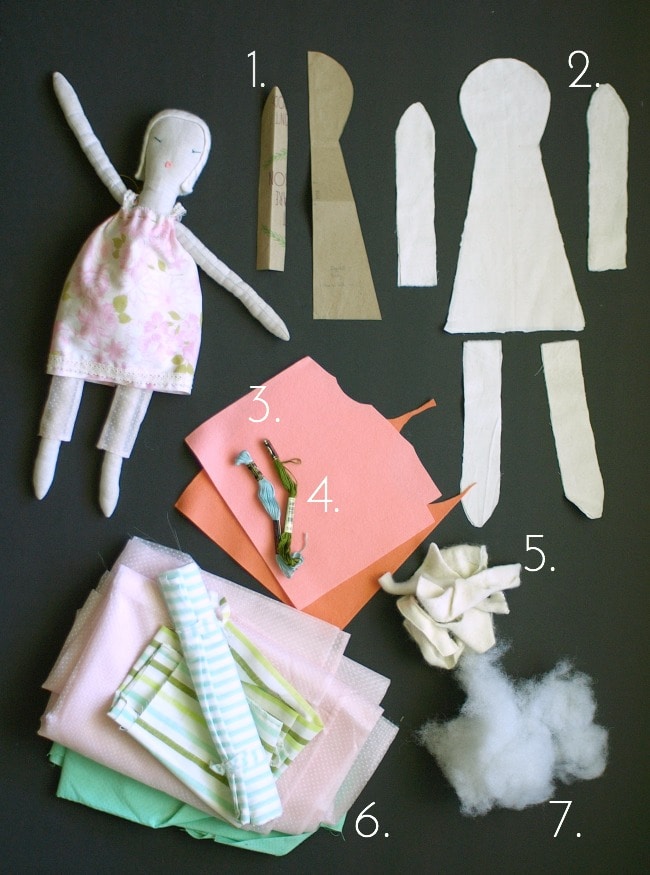
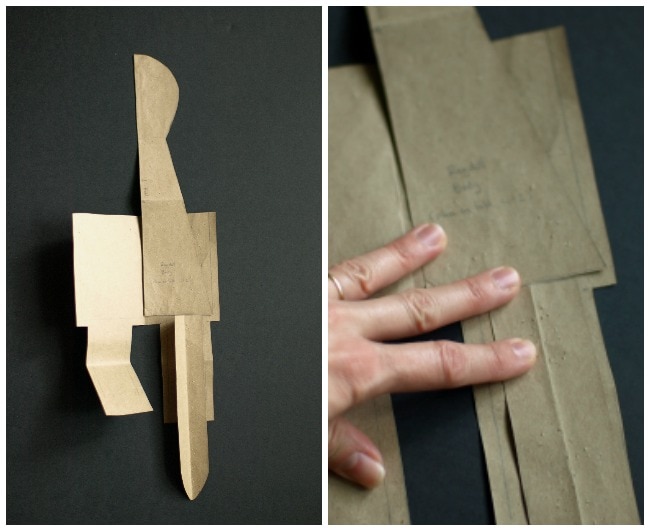
1. pattern–I use paper grocery bags to make my patterns so they hold up to repeated use
2. muslin, linen or cotton fabric in your choice of skin color
3. wool felt (just a tiny bit will do!)
4. Embroidery floss
5. felted wool (I get mine from old cashmere sweaters that have gotten holes in them)
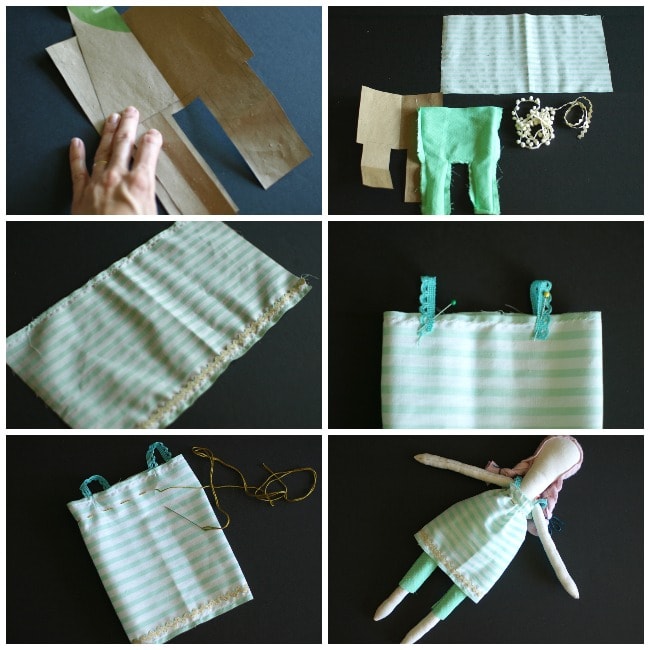
6. fabric–vintage fabric is especially great for the dresses and pants
7. batting
8. typical sewing supplies–scissors, pins, thread, needle, sewing machine, etc.
Pattern
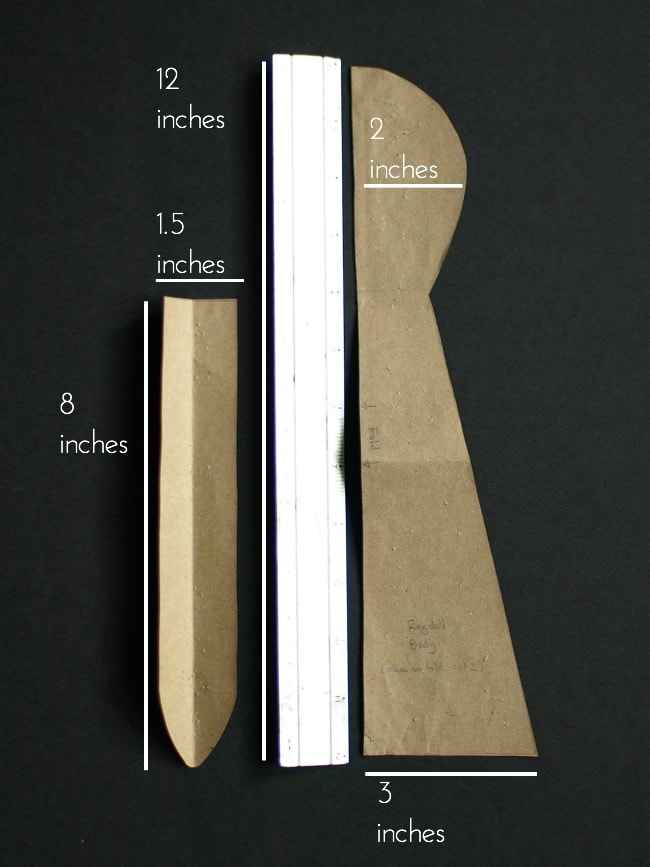
If you’ve never made a pattern before this is a great place to start. As I said, I use paper grocery bags because they’re durable and can be used over and over again. But if you don’t have that use whatever you have! Also I just make a half-pattern piece so that it can be placed on the fold of the fabric and both sides will be even. You can of course just fold the paper in half, trace + cut and get a full pattern–it’s up to you. And since you’re making your own pattern feel free to change the size of your doll! I know real JB dolls are a lot bigger than my version.
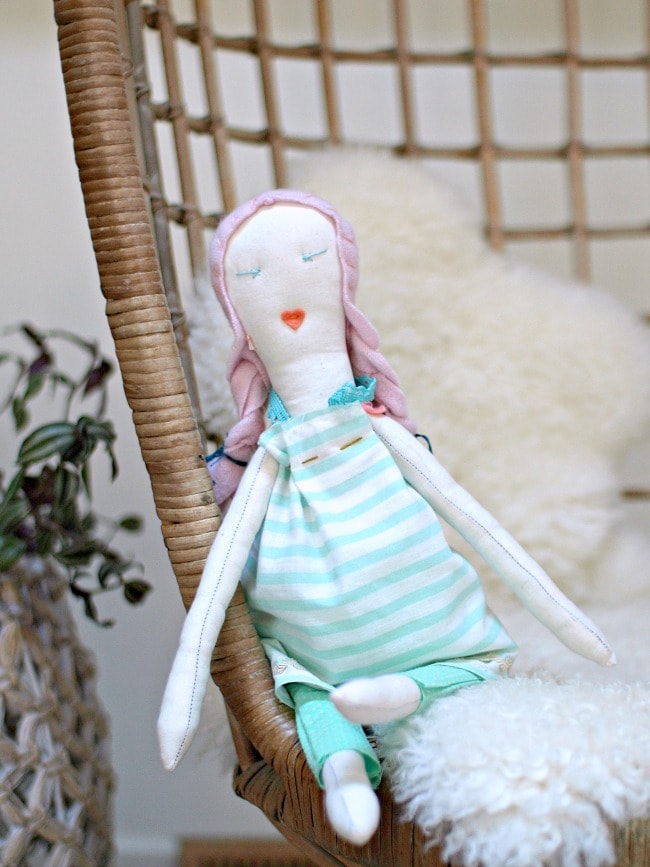
The body measures 12 inches tall, the bottom width of the doll is 3 inches, and the widest point of the head is 2 inches. Just make a similar outline and you’ll be set. You may want to test it out on a piece of paper before cutting out fabric just to make sure that the head is a good shape when it’s unfolded.
The arms are 8 inches long and 1.5 inches wide. Just cut out a long square and taper one end. Easy right? I’ll show you the pattern for the pants later.
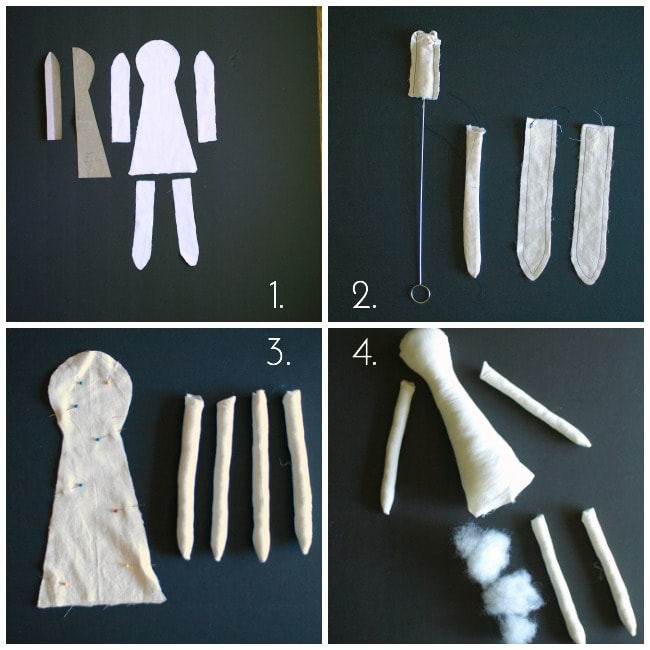
1. Using your pattern cut out 2 whole doll bodies (remember to line the pattern up along a folded edge of fabric, pin in place and cut) and then 8 arm + leg pieces (2 pieces for each limb).
2. Sew leg and arm pieces together with a quarter inch seam! It’s a small seam and it needs to be small so be careful! (I supposed you could make the pattern a 1/2″ wider if you wanted a bigger seam allowance.) Then use a loop turner (buy one! Lifesaver!) to turn each arm/leg right-side-out.
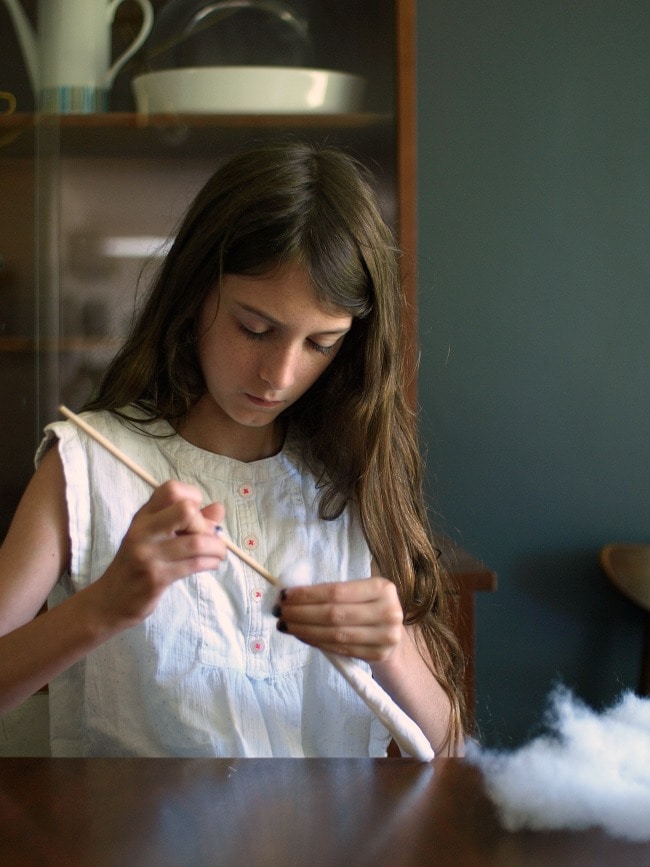
3. Stuff each arm and leg using a pencil or a stuffing stick. This is the longest part of the whole doll making process. Also sew the 2 sides of the body together.
4. Stuff the body.
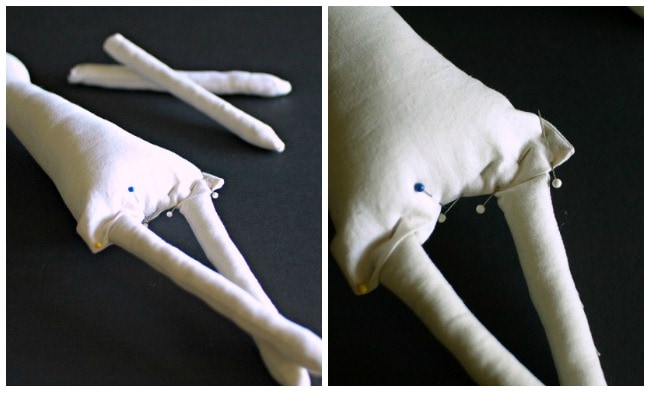
Turning the bottom part of the doll inward so that you don’t have a raw edge hanging out, pin two of the legs inside. Sew a straight seam across the bottom.
To attach the arms cut two button sized pieces of your wool felt. You’ll need a needle and thread. Nicely tuck the ends of the arms together, then place a piece of wool over the top and pin to the body. Do this on both sides. Then hand sew the arms on going back and forth, through the body and between both of the arms.
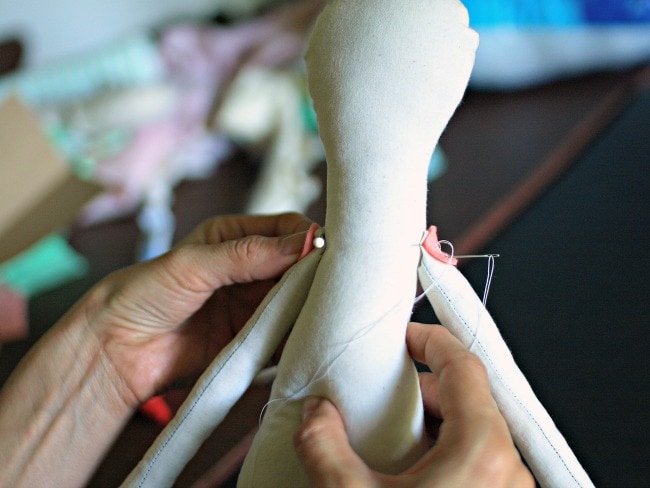
The body of your doll is done. Time for the hair!
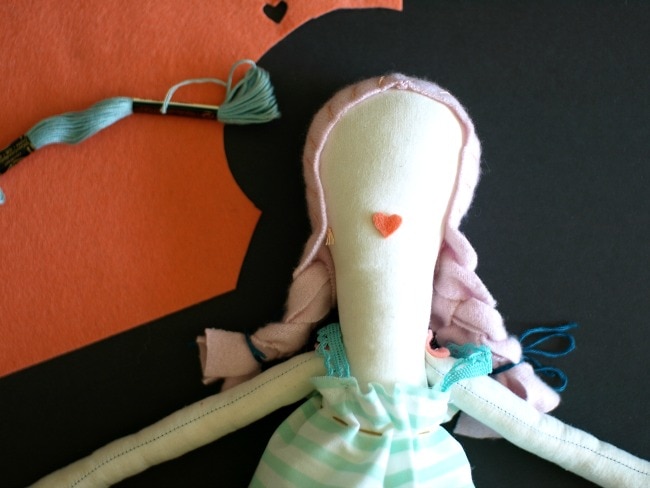
As I said I use old cashmere sweaters (that have holes in them. tear drop.) as it makes for the softest, prettiest hair. You could also just use regular wool–either way wash them in hot water and dry them a couple times so they have that nice felted quality.

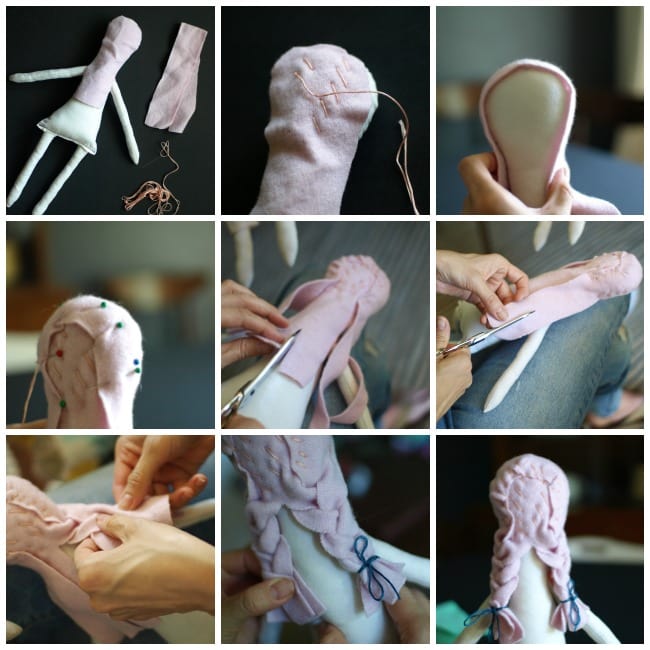
First cut a long piece that will go across the entire back of the head. It should be rounded at the top to match the head. Sew on with embroidery floss in a coordinating color in big, diagonal stitches. Next cut a LONG piece that will go down one side of the dolls head, around the top and down the other side. This piece is thinner, but longer. Pin in place and stitch. Now if you’re doing the short “bob” cut, just cut the ends even around the neck area and you’re good to go. If you want to do braids cut both sides and the back piece into two pieces so you have 6 strands total. Then braid each side, and tie off with more embroidery floss. Done!
We’re getting there guys! We’re getting there!
Pants and dress.
For the pants pattern you’re going to use your doll body and legs and make a square pants shape + 1/4″ inseam. Placing the doll pattern in the dead center give those pants a square top, making the width 1/4″ larger than the widest part of the bottom of the doll. Then add the legs and again add 1/4″ all the way around. You can do just a half pattern again, but this time I cut a whole one.
Then cut two pieces of fabric for the pants. You’ll also need a length of 1/4″ elastic for the pants and some trim for the dress. Place the pants pieces right sides together and sew along the sides and around the crotch area of the pants. Be sure to leave the top and the leg bottoms open! Then make a little casing for the elastic, insert elastic and sew into the top of the pants. (If you need to see a better example of this step, check it out here.) You can just leave the leg openings with raw edges.
For the doll dress cut one piece of fabric 8.5″ tall by 15″ wide. If you want some sort of trim, sew it along the bottom now. Also, like the pant bottoms I leave the dress edges raw as it adds to the handmade charm. So I just sew a little zig-zag stitch along the top and bottom to keep the fraying in check. Folding the fabric in half–short sides together and right sides of the fabric together–sew a seam along the short length. Now add some straps along the top–they should be pretty short so just eyeball it and make sure to have the seam in the middle back. Sew the straps on. Now take another piece of embroidery floss and just go in and out along the top of the dress to create a gathered tie. Make sure to keep the ends long in the back (and knot them at the ends) and then you dress has a simple tie!
Just the face! Just the face!
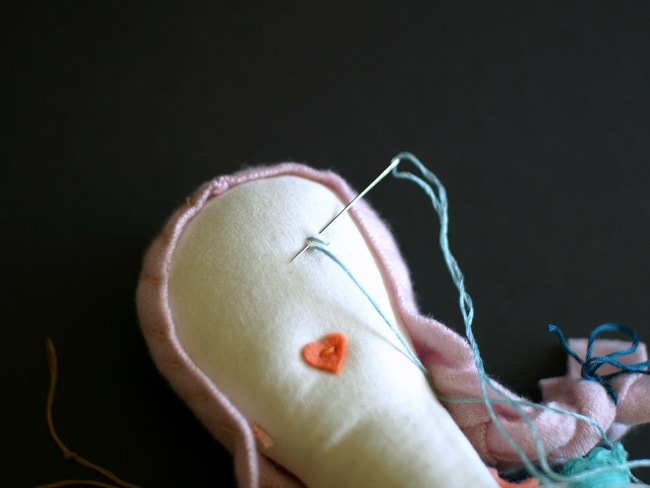
Take your felt again and cut a teeny, tiny heart for the mouth. Sew it in place hiding the stitches underneath the hair.

Then take more embroidery floss in whatever color you want for the eyes and make your little star eyes. I make mine more of an x with one bigger line going to the outside, but JB’s doll’s eyes look a little less neat–in a good way. Either way I don’t really think you can go wrong…I just wish I would have made mine a little bigger. And remember to hide the stitches behind the hair.
And you’re done!!
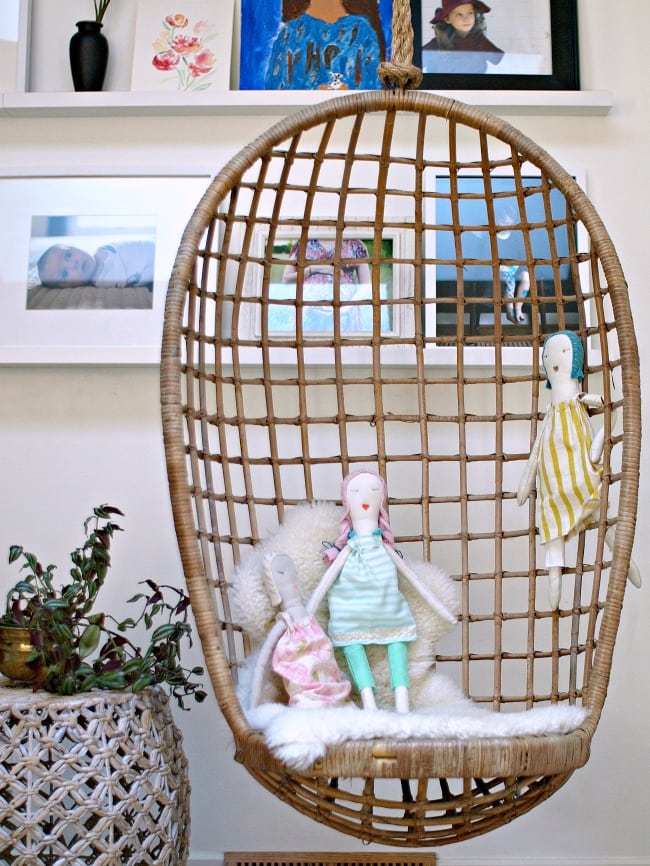
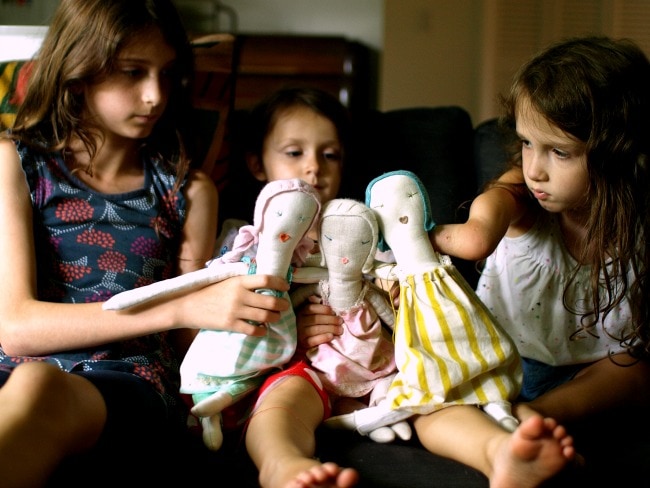
Meet Kiki, Coco and Lulu–cutest dolls in all the land.
My three girls love having matching dolls and I love having made them.
Please let me know if you end up making a doll–I’d love to see it! And if you have any questions I’ll be sure to answer in the comments below.
Good luck!
XO,
Miggy

very cute. I might try that some time.
I made similar dolls one Christmas to match every member of our family.
You did a fabulous job on this!
Embroidery Digitizing