

I have mixed feelings when it comes to accessorizing baby girls. About the time I had my first baby the ginormous flower/bow baby headbands came into fashion and it just wasn’t me. In fact I find a lot of baby girl hair accessories just aren’t my style. Additionally, sometimes I feel like we’re supposed to put a bow on our baby girls as a way of letting the rest of the world know, Yes, this is a girl baby. And something about that just annoys me.
Buuuut, it is fun to be girly and there’s a limited amount of time when you can put anything you want in their hair and they can’t yet pull it out/protest/run away. And there’s something about a small, fabric bow in a cute print that hits just the right note for me. Somehow it seems classic and modern at the same time. These little bows take a little practice to get them just right, but once you figure it out they come together pretty quickly.
Materials:
Fabric
sewing machine + iron
long needle
hot glue gun
ribbon (love this velvet ribbon) and elastic

1. Grab some fabric scraps. Since they’re pretty small you can use your fabric scraps for this project. I was so happy because I’ve held onto a few scraps of fabric I just love, but the scraps were too small to use elsewhere.
2. Cut them into rectangles. I didn’t measure exactly, just cut based off size of scrap I had. That being said, the smaller it is the harder it will be to work with.
3. You can see that the bottom red one ended up being 4inches long and a little less than 2 inches wide. Feel free to play around with the proportions here. Also make sure you have extra fabric for the middle band. As you can see those scraps are even smaller.
4. Fold in half the long way and sew a seam along the side with a small seam allowance. Remember these bows are tiny! Since the seam will be covered up anyway you can just sew the seam on the right side of the fabric.
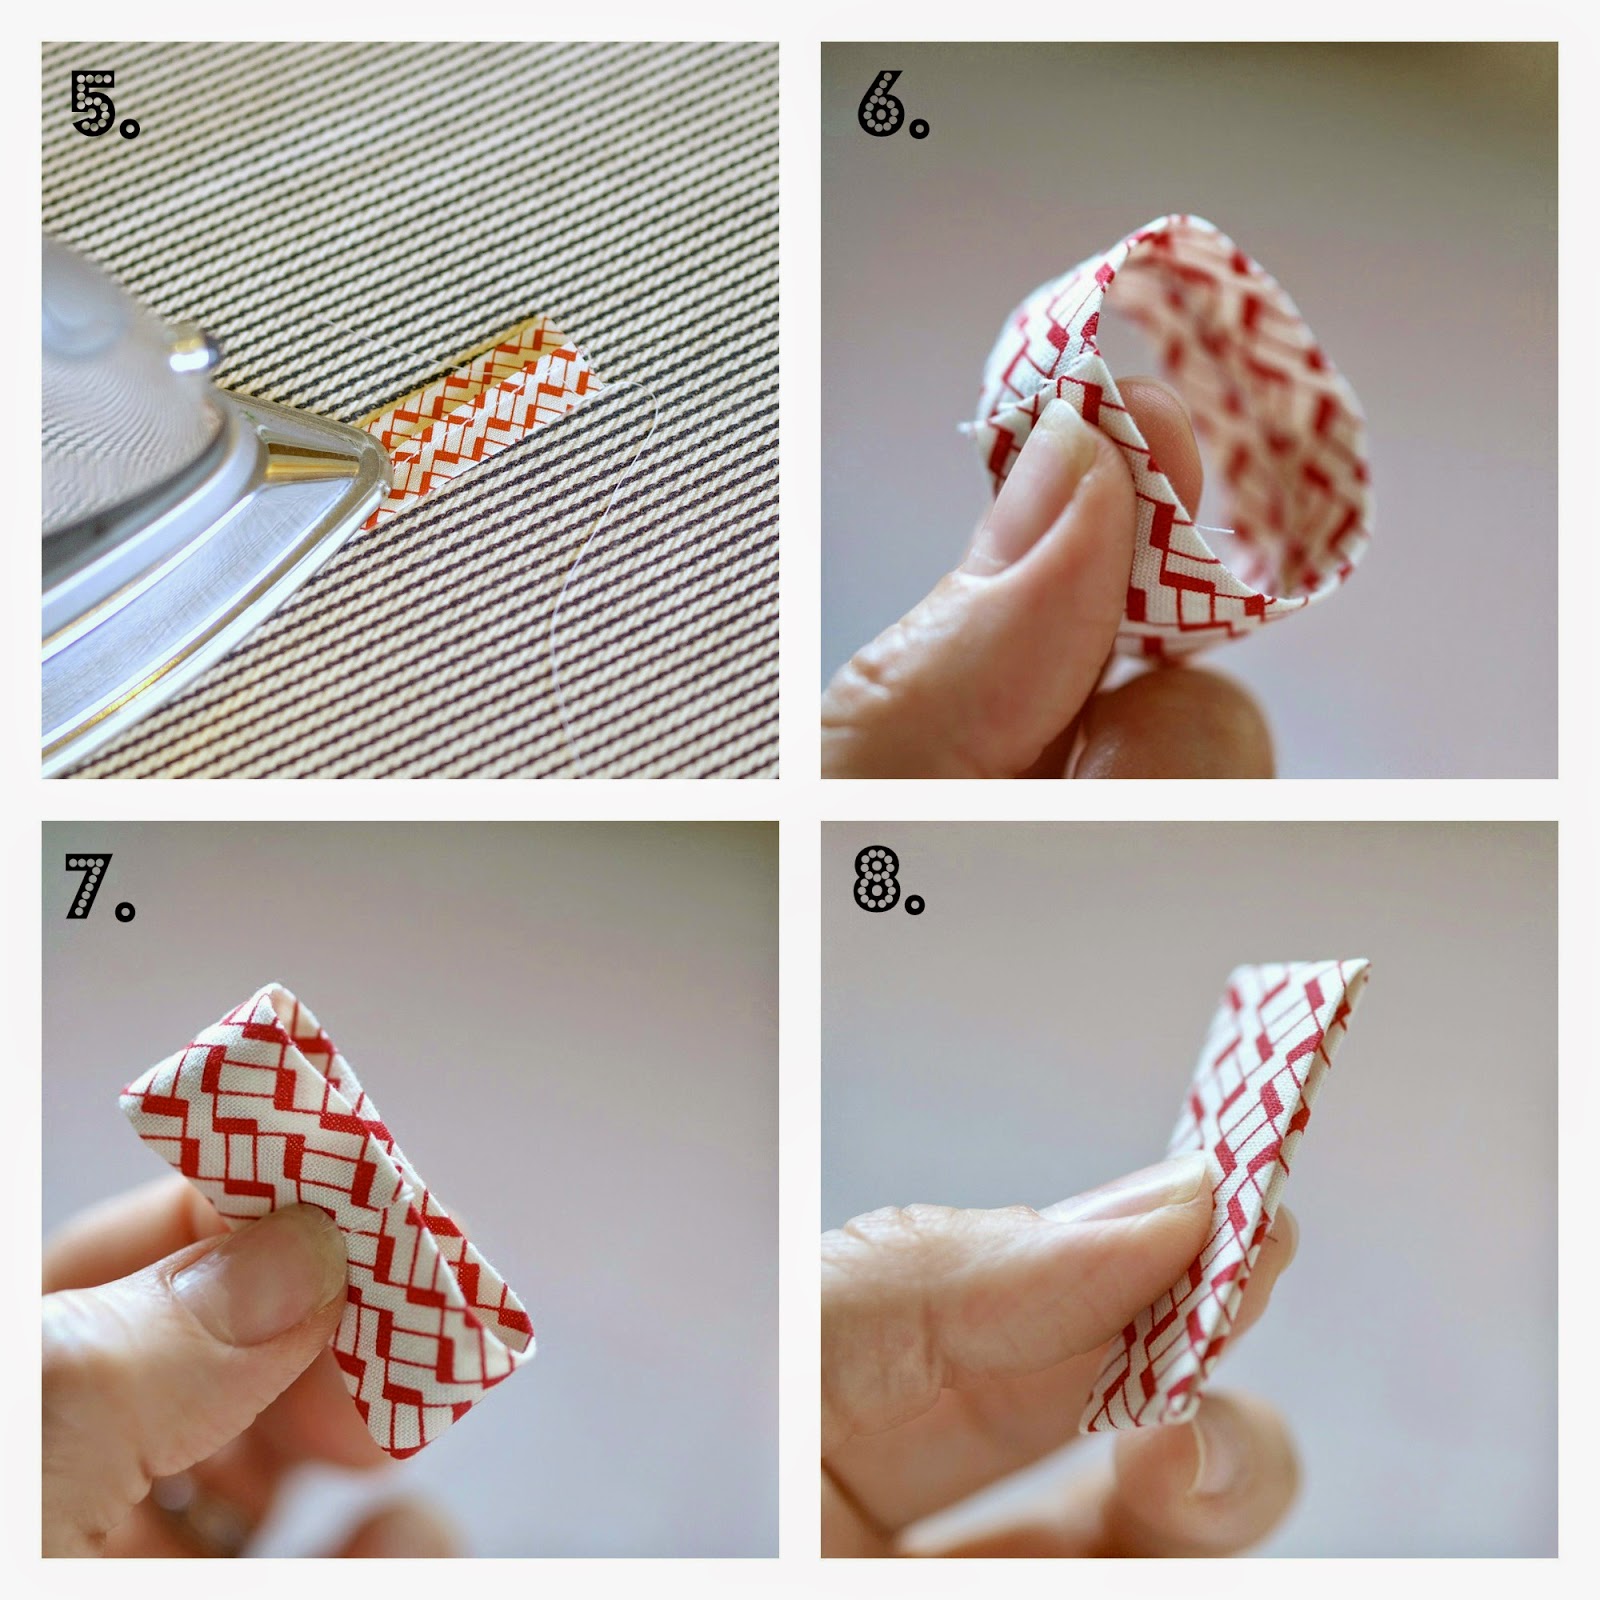
5. With the seam in the middle of the fabric, iron it flat.
6. Now loop it together with one end tucked inside the other end. It may help to fold the corners a little to get the end securely inside. You want to have plenty of overlap for step 9. Also the seam should be on the inside of the loop.
7. Now fold the bow making sure that the raw edge of the fabric is in the middle.
8. Iron flat.

Now you’ll want a good sized needle for this next part. This pin is quite a bit bigger and longer than most of my push pins.

9. Now to make the proper folds in the bow you’re going to weave this pin in and out of the little fabric bow you have. Start with the pin going in on the top or upper part of the fabric. It may help to draw a line in pencil marking the center.

10. Try to get 3 distinct pleats like this, and then push it all together to get a nice little scrunch. If they end of your fabric isn’t pushed far enough into the opposite end, this is where it will fall apart. I tried sewing the ends together, but it made it too bulky for this step (at least for the size of bows I was making).

11. Now get some thread or even embroidery floss and tie it tightly around the middle a couple times so you can remove the pin and still have those lovely pleats. Make sure to cut off the end of the thread.

12. Now cut your smaller piece of fabric into a long rectangle.
13. Iron the sides into the middle hiding the raw edges of fabric.
14. This step is important! Make sure to line up your smaller loop in the middle of the bow. Hopefully your thread is in the middle, but it may not be exact…so line it up. You will let out a few swear words if you almost perfect bow is a little lopsided.
15. Starting at the back place a tiny bead of hot glue (be careful little fingers!) and place the end of your small loop on the back. Continue to place small beads of glue around the center as you pull your middle piece of fabric tightly around the bow. You could probably use fabric glue, but it really helps to have something fast drying here.
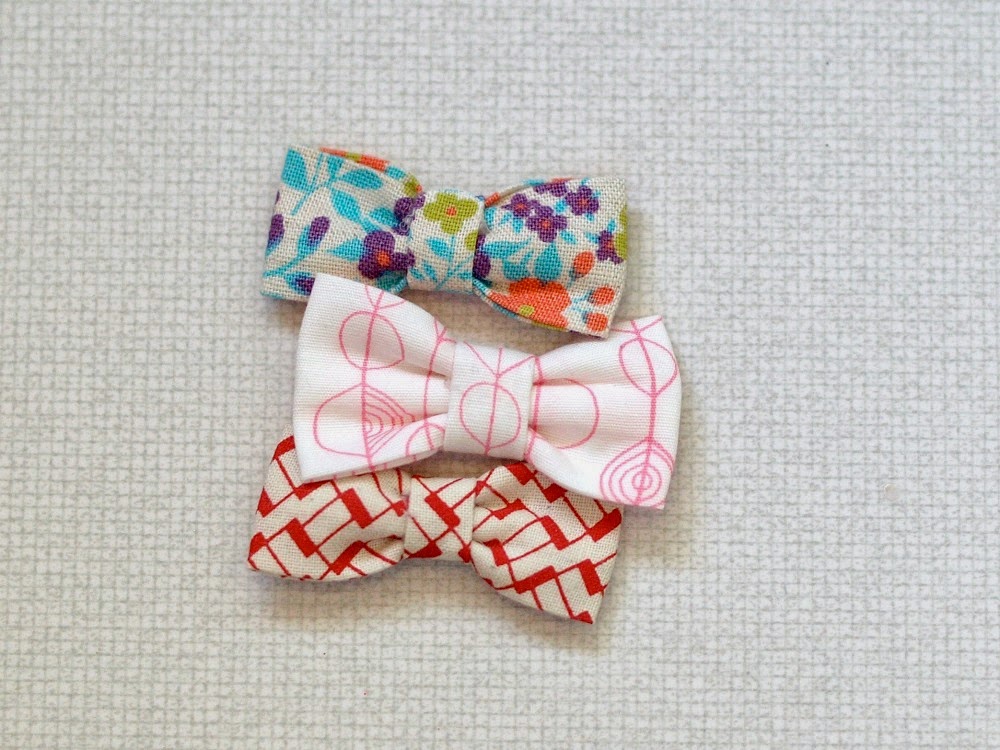
You now have cute little bows! Yippie.

Gathering some very soft and thin elastic (I like this kind for little baby heads) plus some cute and dainty ribbon you can sew them together to make cute little headbands.

Make sure to measure baby’s head and add 1-1.5 inches for overlap. Also, use at least 5 inches of elastic around the bottom so you have plenty of soft stretch. I even just made one headband entirely from the elastic and of course it’s the softest and stretchiest of all. Then just hot glue your bow on. Make sure to glue your bow slightly off center on the ribbon.

Bows and headbands for the win!
You could also attach bows to barrettes if you’re not into headbands.


I kinda have to admit…I think I’m converted to bows on my baby.
Whats your take on babies and bows? Do you like them loud and proud, or are you more like me and shy away from bedazzling these little ones?
Are you converted? Maybe?

those look great! I especially like the blue floral and red/white ones. I wasn't a fan of big bows either and found these small satin bow headbands in various colors on etsy, which my toddler still wears now.
https://www.etsy.com/listing/77937969/silver-sequin-bow-headband-baby-headband?ref=shop_home_active_5
https://www.etsy.com/transaction/61346283?
and also these Goody ones from Target, they're small and don't snag
http://www.target.com/p/goody-5ct-girls-bow-salon-clips/-/A-13966623
Yay! I'm so glad I got to see her in the onesie I made for her! Looks good! Do you like it?!
Yes I love it! Super cute on her…maybe a guest post is in order. 🙂
Totally!
Those are precious!
BTW, did you see the video of the young cello player who is missing his left hand, and really most of his arm. It's really amazing. I'm in awe of him and his teacher, who obviously wasn't one to say it couldn't be done. http://www.classicfm.com/music-news/latest-news/incredible-one-handed-cellist-performs/
Laura in San Antonio
Thanks Laura! And yes I did see that video…thanks for sending it along. Super amazing. My husband and I were both really impressed.
Very cute!
love the bows, perfect size, and I love the patterns!
Thanks lady.
This tute came at the perfect time! I whipped up a couple of these babies Saturday night and put one on baby girl for her blessing yesterday. Thanks much!
Oh, and I'm excited that y'all are coming back to cincy! It really is a great place for families.
Soo nice post.
Push Video Wallpaper Crack
Amazing post.Thanks for sharing.
Vuescan Crack
cabs2go cab Rental from Mumbai to Shirdi and get best Best Deals on your cab booking. Hire taxi for full day from Mumbai to Shirdi. Taxi Rental services available for all types of cab
mumbai to shirdi taxi