
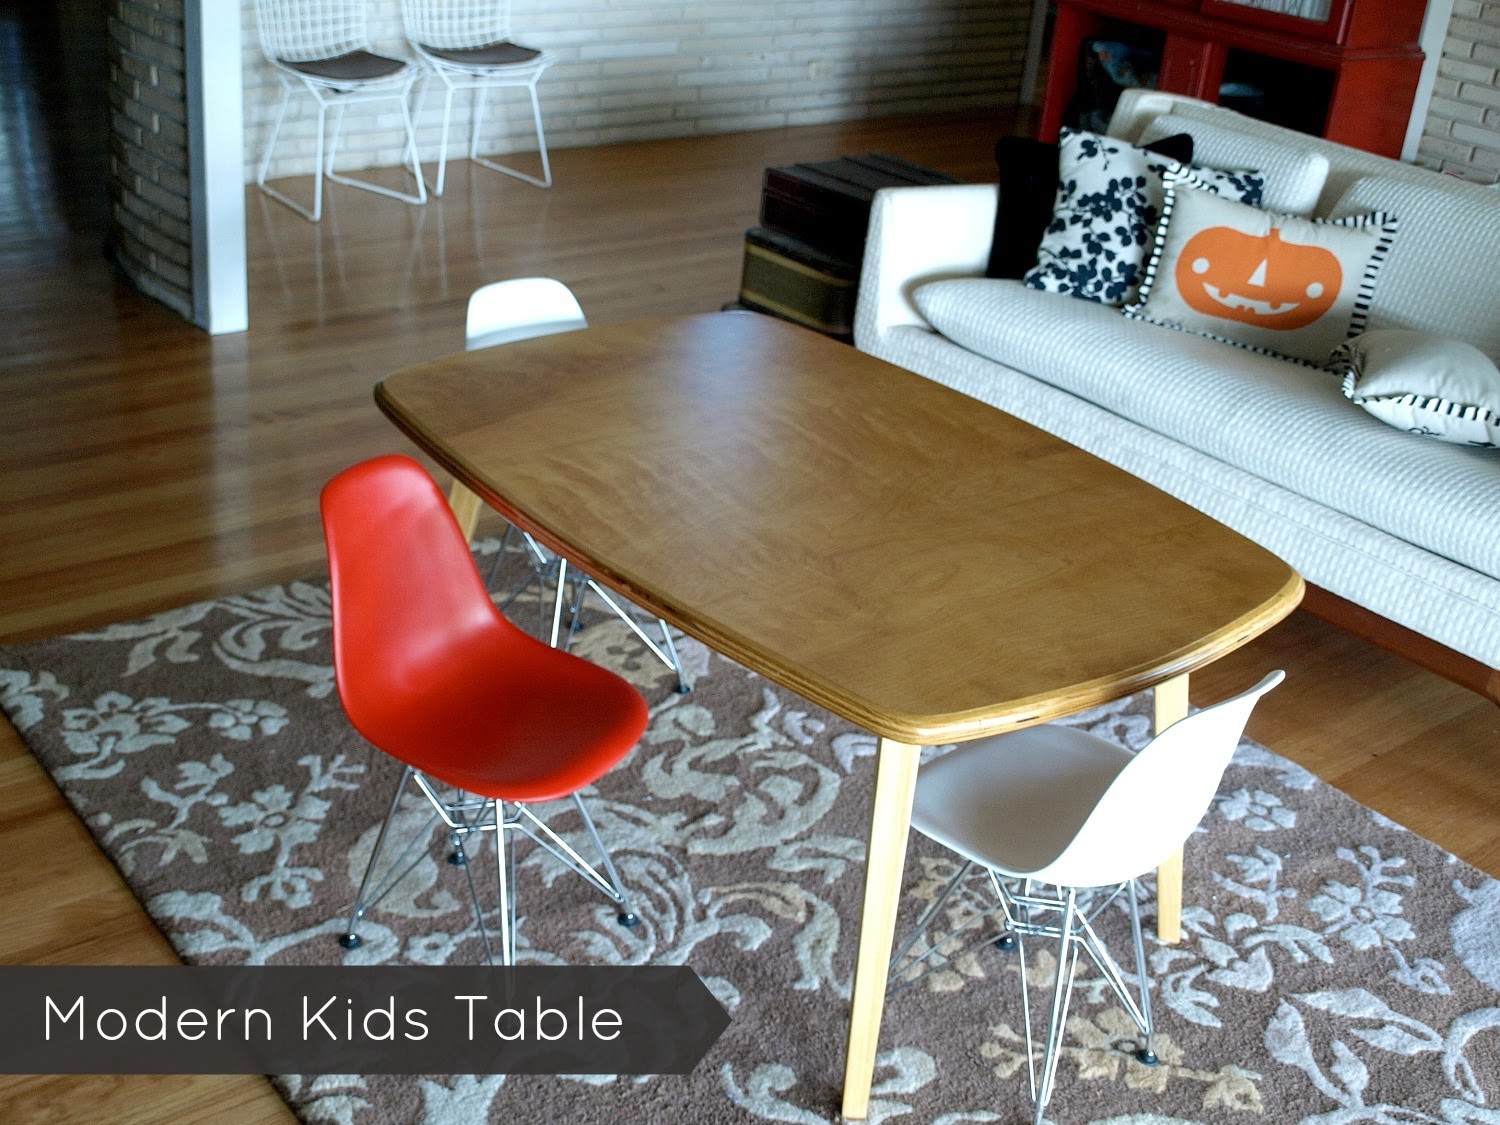
Recently my mom said that my husband and I “project people” and I suppose we are. As much as I like doing a project, I like finishing one even more. And the past couple of weeks has felt great having some big projects checked off the list. The quilt of course being one, but also this new kids table B made. We’ve had a small ikea table & chair set for years that has worked just fine–it seats 2 and back in the day we tricked it out with a chalkboard top and a place to hold a roll of paper underneath. But one day I borrowed my friends kid table that happened to seat 4 and I knew I really, really wanted something bigger. And prettier. The above table is what we came up with.
B was inspired one day at Nordstrom’s when he noticed some of their display tables were simply double stacked ply-wood. He liked the thick edges with a multi-layered look. I wanted an overall shape that was rounded and smooth–a rectangle with the sides bowed out a little and rounded corners. We both decided on tapered legs that would angle out a little giving it that mid-century feel. I wish I was better at breaking this down into an actual DIY for any woodworkers out there, but all I have to offer are these progression photos. B has had a few inquiries about the bed and he has responded to them where possible, and I know he’d be happy to share any tips about tackling something like this as well. Here are some of the basic details: The table top is ply-wood, while the legs were a separate hardwood–both purchased at Home Depot. He used Waterlox for the finish which is super durable. For the first 3 coats he used Waterlox original and as you can see in the bottom right photo it leaves a pretty glossy shine. So for the last coat he used the Waterlox satin finish and I love it. (Satin is rather difficult to apply, so it’s better to use it only on the final coat). The wood was about $70 (with lots of plywood left over), the hardware for mounting the legs about $10 and he already had the finish. Not bad for about $80 in supplies.


Another great thing is that I scored big time on these kids chairs. Seriously, these were an amazing deal but they only had 3 left–2 in orange and 1 in red. I used Krylon Fusion for plastic spray paint to paint the 2 orange chairs white which works really well as long as you follow directions to the letter (I have some retouching to do). I may or may not paint the red one white as well, but we’ll see… I’m still hoping to score one more chair–fingers crossed. In the meantime one of our Bertoia’s is acting as a good stand in.

One thing we didn’t even think about when we made this table is that it’s big enough for PSP to work on while Lamp sits on top and works there as well. Since she prefers to work with her feet Lamp would usually have to sit on the floor or we’d have to find another solution, so this works even better than I imagined! Last weekend the girls did their first dual project on the table together…
Dream catchers. So cute.

I told B that since this isn’t an actual DIY it’s more of just a brag post (like the quilt… no I’m not done talking about and linking to the quilt).
But what is a blog for if not the occasional brag?
Thanks for indulging me.
A friend sent us this video and said it reminded him of B. Totally made us laugh.

love it and love your daughter on the table too.
Thanks Lady!
Before you even mentioned Lamp on the table, I saw the picture and thought the same thing!!! I made a king-size quilt last year and I STILL talk about it. Keep up the good work!
Michelle–Ah, so glad you can relate to the quilt bragging. 🙂 It IS a big deal right?
You can get another Eames chair at Nest USA! They're on clearance right now for $25 🙂
http://www.littlenest.com/sample-sale-childrens-kids-eames-dsr-chair.php
Karen–That's exactly where I got the first 3! Unfortunately when you try to add them in the cart they tell you they're out of stock…I've been checking back regularly though just in case.
Amazing. I'm not a DIY girl at all, but I seriously want to hire you to come out and decorate my home and while you're at it, my life. You and your hubby make an impressive team in so many ways!
Beautiful job! And had I been responsible for that beautiful quilt I would be making references to it constantly. Seriously. I would print up cards with its photo and hand them to strangers and say, "Look what I made."
What an amazing play area for your girls! Beautiful table!
Hi Miggy, you are probably aware of this, one of your special needs spot light families daughter passed away on 26th October. It is the Hodder family. There precious little girl is Aviana. This family have become very dear to me. They are beautiful and gracious. Our souls connect on a sacred level. I just want to thank you for the spotlight series that you have taken on. I'm sure there is a ton of work that is involved in developing theses spotlights. My life has been so enriched by all of the wonderful stories that I have read about. I love the Hodders and all that they stand for. Theirs is a journey of beauty, love and unselfish sacrifice. Once again, thank you!
I'd like to take a minute to talk about the features that you should be looking for and what these features will mean to you after you unpack and set up your new table saw.https://simplehandyman.co.uk/best-belt-sander-reviews/
Oh, and did I mention that kids who take part in the cooking have more varied, nutritious diets? Vaikiški vežimėliai
This book gives you step wise extensive guide along with three golden lessons that helps your kids learn all the right things about survival Kitchen design victoria
if you happen to have twin babies. Aside from that, there are also baby slings and soft front or hip carriers Mr. Levinson