

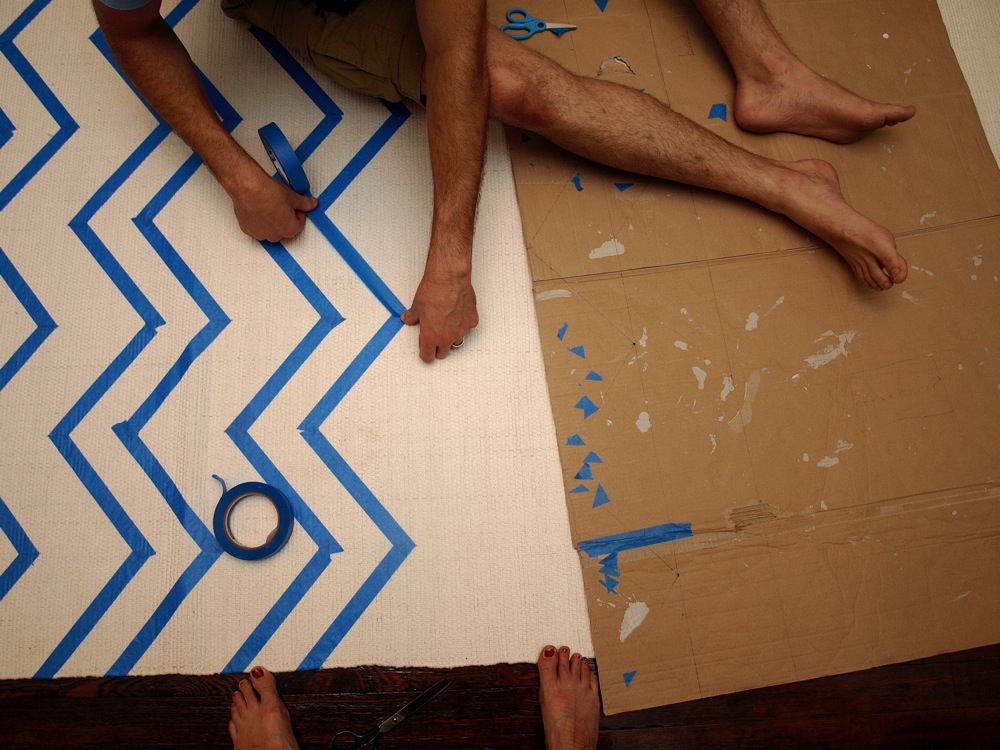
Figuring out the measurements and taping each row.
We used this piece of cardboard to draw our line and then it became our measuring tool. Totally the husband’s idea and totally brilliant.
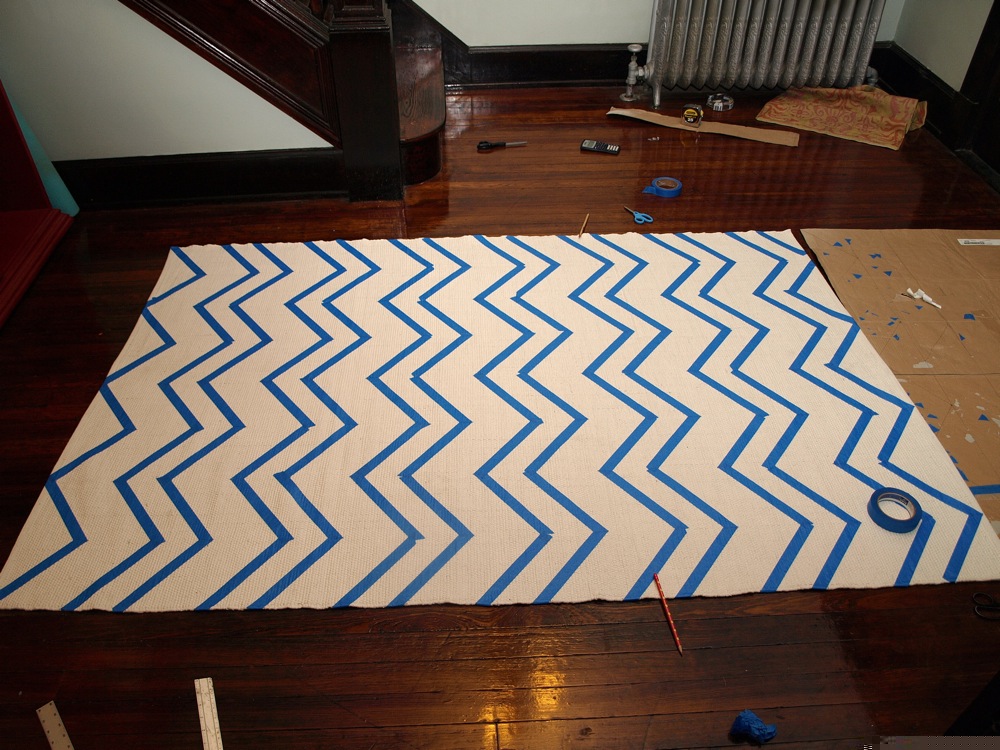
The rug completely taped up.
All the lines are the same size, but since we kept some of the stripes white, the tape goes on the inside portion of each white stripe–thus they look smaller, but once you remove the tape they’re the same size.
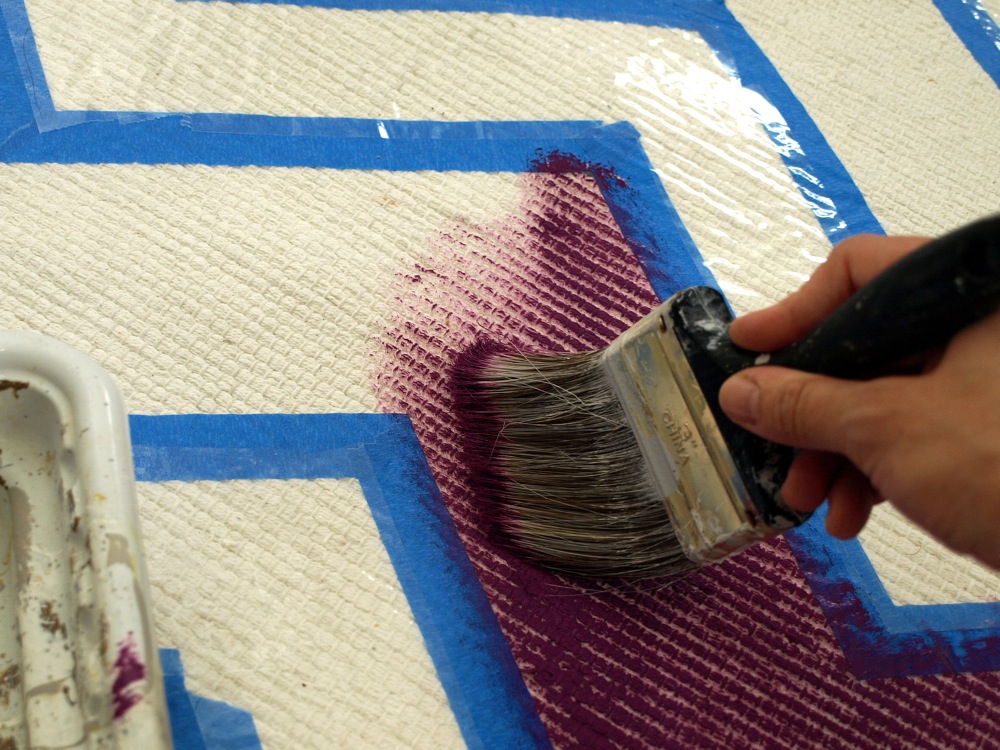
Painting.
I used sort of a dry-brush technique. I wanted a more worn-in look, and I didn’t really want each stripe to be solid paint because a) I knew it would just crack and look worn in eventually and b) I also knew it would just be really hard and stiff on those parts of the rug. It’s obviously still a little stiff because you know, it’s just house paint. {B wasn’t so convinced…he liked the idea of more solid color. To each his own.} You can also see that I went over each white line and covered it with packaging tape. I didn’t want to take any chances of spilling on the white sections, and packaging tape is cheaper than covering it all in blue painter’s tape.
All the stripes painted before removing the tape.
Doesn’t look that great, right? 
The final look.
I love how it turned out.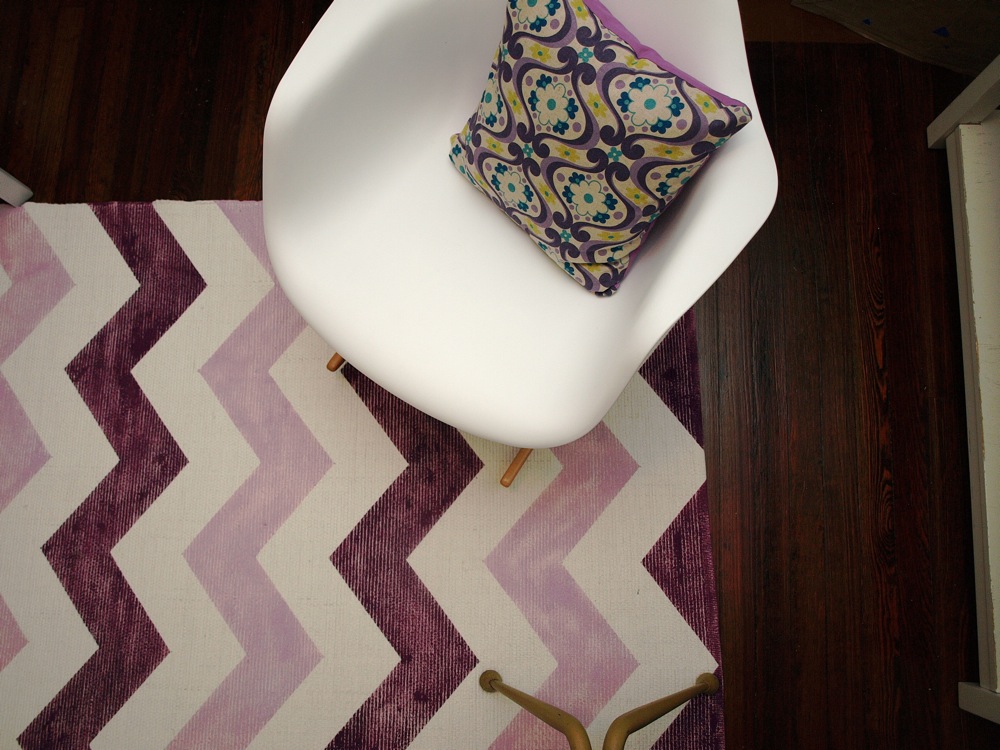 This isn’t the best picture–it’s kinda dark–but I really love the final result. It’s got a bold and sharp contrast, but kinda worn-looking at the same time. I only used 2 sample sizes of paint {from Home Depot}. As mentioned the rug is a $30 Ikea model {similar to this, but larger} and the total time investment was about 3.5 hours–included measuring and figuring out the right length, height and width of each stripe.
$30 rug, $6 in paint, 3.5 hours and a little elbow grease?
I’m sorry, but you just can’t beat that with a stick.

That is freaking awesome. Excellent work.
Love it! You've got such a great eye for colors and coordinating them. I guess that's what happens when you were in a Master's program.
Thanks you guys!
It looks awesome! I would love to have that nursery. Good work. Miss you guys.
xoxo
HELLO GORGEOUS! I was skeptical when I saw the first picture. Yet, the final product is fabulous! I love your rug! Way to go 🙂 B is awesome for helping. You two are quite the pair 🙂
this looks so great! i love the worn in look you choose and the color combo. i don't think i would have envisioned it so well. awesome!
I've been agonizing over the rug in the nursery, but now I feel inspired. Thanks for the tutorial!
FANTASTIC! Love it. LOVE IT. Way to go!!! You are a talented, witty, wonderful woman!
i have seriously been looking everywhere for a cheap chevron rug! thanks for this idea!
http://www.keepfashion.wordpress.com
Wow! I love. You've definitely won me head over heels for chevron stripes. This makes me want to start this same project myself.
Thanks everyone…I'm glad you like it. For those of you interested in doing a similar project, let me know if I can help with any of the details…getting the measurements right was the trickiest part.
I plan on making one of these, what were your measurements?? That would save me SO much time!!
that is awesome! i want to try something like that.
Applause! Applause! I know I would not have the patience to do that much measuring and taping. Well done! Love it.
amazing! i have to do this!
I think what I love about this post the most is I can actually do this at home! 🙂
I love a low-cost project that doesn't look low cost! Did you seal the rug with anything?
I loooooove zig zag rugs–yours turned out so great! I did one a while back, too, but I made the rug out of heavy white canvas… here's the story! http://www.adventuresindressmaking.com/2010/01/i-am-so-proud-of-my-diy-zig-zag-rug.html
what are the measurements you used? Great rug!
Any tips on how to tape it off and how to measure the zig zags to get it just right?
Couldn't help myself. Had to have it for number two's nursery. Thanks for the tips. We're really happy with how it turned out and even more happy with the killer deal at only $38 total. Thanks!
http://www.flickr.com/photos/19677794@N02/5105393094/in/photostream/
LOVE this! 🙂
I picked up the same IKEA rug this past week and plan to do a red/cream chevron pattern on it. Any measurement tips?? Yours is PERFECT!!
Your chevron rug project was my inspiration for my latest DIY project ~ would love for you to take a look: http://www.sasinteriors.net/2011/03/diy-turning-an-old-rug-into-a-chevron-beauty/
Jenna, SAS Interiors
http://www.sasinteriors.net
I love this rug and how you used 2 different colors for the stripes. I really want to try this.
Love the rug! I am looking at doing one this weekend. Any tips for measuring? Thanks
Miss Miggy- totally brilliant! I had to share your beauty today on my blog. I need to do this… asap. So amazing. Thanks for the killer inspiration!!
xo
Jessica Rae
http://lovelyuglydesign.blogspot.com/2012/04/painted-rug-diy-brilliance.html
Super result! I like it, and I'd never thought about painting a rug))