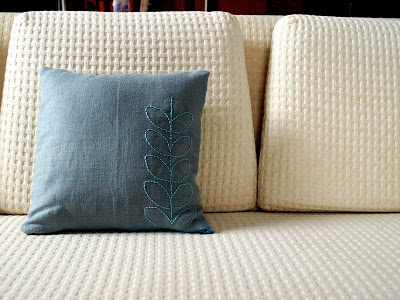
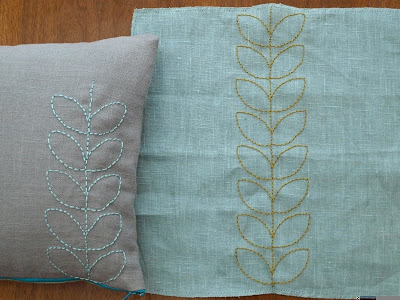
I’ve been working on some new pillows for the both the shop and my house. I’ve decided to do a little embroidery using the leaf pattern you’ve probably all seen around for the past couple of years and made particularly recognizable by Orla Kiely.
When I sat down to figure it out, it came to me almost instantly. I’ve long since been a fan of the compass and the square–I use it in almost all my paintings–so this was a very natural and obvious pattern for me. I thought I would show you how to make the leaf pattern as well. Of course Orla’s is a slightly different, more rounded at the top, not so uniform, but this is a really nice version. You could use it for lots of different things around the house–to embroider on bags, pillows, hand or kitchen towels, you could make a stencil to paint or glaze on various surfaces, you could do a paper cut out and frame it as wall art… really there are so many ways you could use this pattern. So, here we go…
You’ll need: pencil, paper, ruler and a compass
You’re going to be making two rows of squares one on top of the other, all the same size. It would be a good time to figure out the size of the squares you want to make. I used 1.5 inches.
First, draw a line and then draw two lines on either sides of the first line–1.5 inches apart {or whatever measurement you decide to use}–you should have 3 lines total.
Then go ahead and make horizontal lines also 1.5 inches apart all the way up, so that you have 2 rows of squares.
Then using a compass, place the sharp side {not the pencil} on the upper mid point, and the pencil side on the lower mid point.
Then draw the curve to the upper corner on either side…
…like so.
You should have a perfect little semi circle.
{You could also just start on the points show in this picture and just take your compass all the way to the other side. duh.}
Continue all the way up.
Then bring your compass down and this time place the sharp end of your compass on either the lower right or left hand point {you have to do it on both sides, so it doesn’t matter which one you start with} and your pencil on the point directly above…
Then bring your curve down to the lower middle point.
Do the same thing on the other side.
Do both steps on all the other squares…
…and voila! You’re done.
Now this just give you the basic pattern–you could always do this on nice paper for a paper cut out, or on thick paper for a stencil.
Here’s how I transfered the pattern to fabric….
Cut out a leaf petal from the pattern you made.
then on the fabric {not on the paper like I’m showing you} draw a center line. {It should be noted that I drew a line down the center because I actually embroidered the center line.} Then mark with dots where the points of your squares would be. This way you don’t actually draw the lines on the fabric.
Then place your leaf on the diagonal points and trace.
This should give you a nice pattern for embroidering.
I hope that was helpful/insightful to someone out there.
If you actually use this pattern around your house I’d love to see the results!


Super cute. Honestly, I would have just free handed the leaves. The compass is better, much better. Fabulous.
Turns out, I just made my first pillow for my bed, and now I want to make more for the couches. This is a fabulous idea, I think I'll try it. Thanks, and congratulations on the pregnancy.
Ann Marie
soooo cute amy. I tried to do an orla rip-off on a metal table but it looks like poop. Your is much much better. I sent a link to this to my friends… we were actually scheduled to get together to make pillows today, but we had to reschedule —- I think is one that we will make. I will let you know if we do!
I need to buy a compass. That one looks cool. What kind is it?
I love this. I'm going to give it a go.
So cute. We need new pillows, but I don't sew. We might be talking…
Rebecca–Hey thanks…free handing would probably work too. 🙂
Ann Marie–thanks and good luck. Let me know how the pillows turn out.
Likely–YES! let me know how the pillows turn out. Oh and the compass…I'm not sure on the brand. I think I just got it at the Wilk back in the day…so whatever you find will probably work well. Also, if you're in a pinch, you can always tie a string to your pencil. This works better when working on a larger scale, but could work on a smaller scale…it's a little tricky. You have to keep the string low on the pencil–and just hold the other side of the string on the opposite point {if that makes any sense….}.
Alissa and Abbie–let me know if you make something with it.
Abbie–this surprises me, I think you'd love sewing…I just bought a machine and was pretty much self taught and just learn as I go. Of course I was hand stitching before that which helped, but honestly it's not hard and sewing machines make it super easy. If you really want to learn you could maybe tap Kendra Cope for some lessons/pointers.
This is genius. Maybe I'll try it on a lamp shade?? I have an Orla Kiely bag that I got two Christmases ago. I think I could just trace the pattern from the purse since it's the right size.
I love those. The colors are perfect.
I love it. And I've been needing some new pillows. I'm totally going to give it a go!
i am beginner in this field i would like to know more about embroidery specially embroidery Machines.